


Creating stickers
Select Stickers
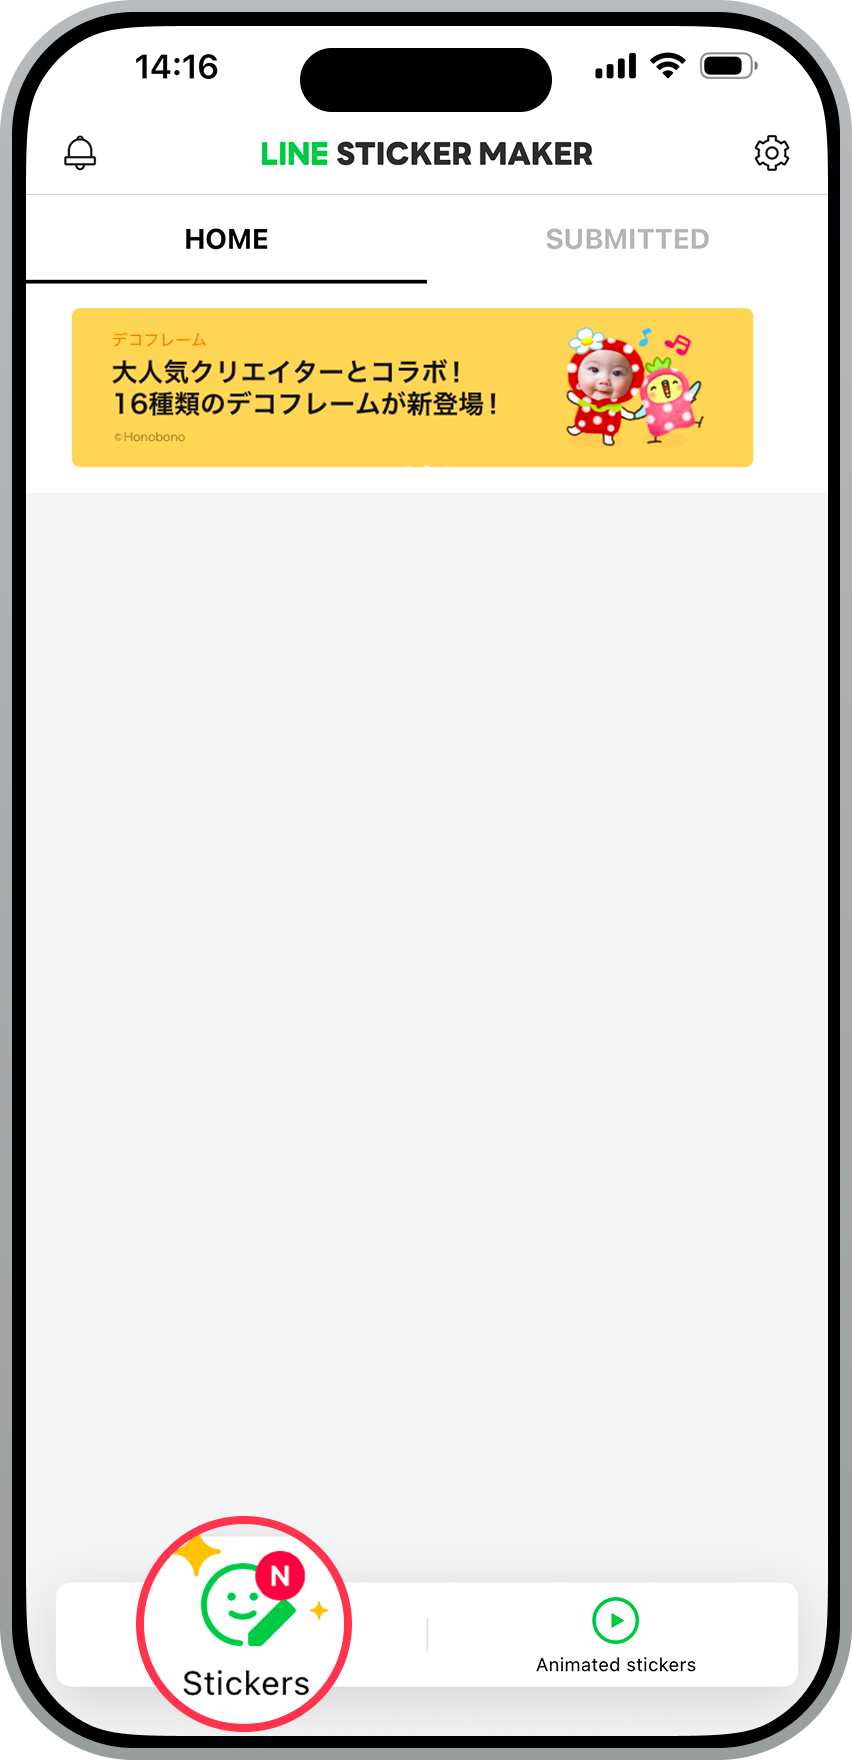
Select Stickers to make stickers from still images.
Select a creation method
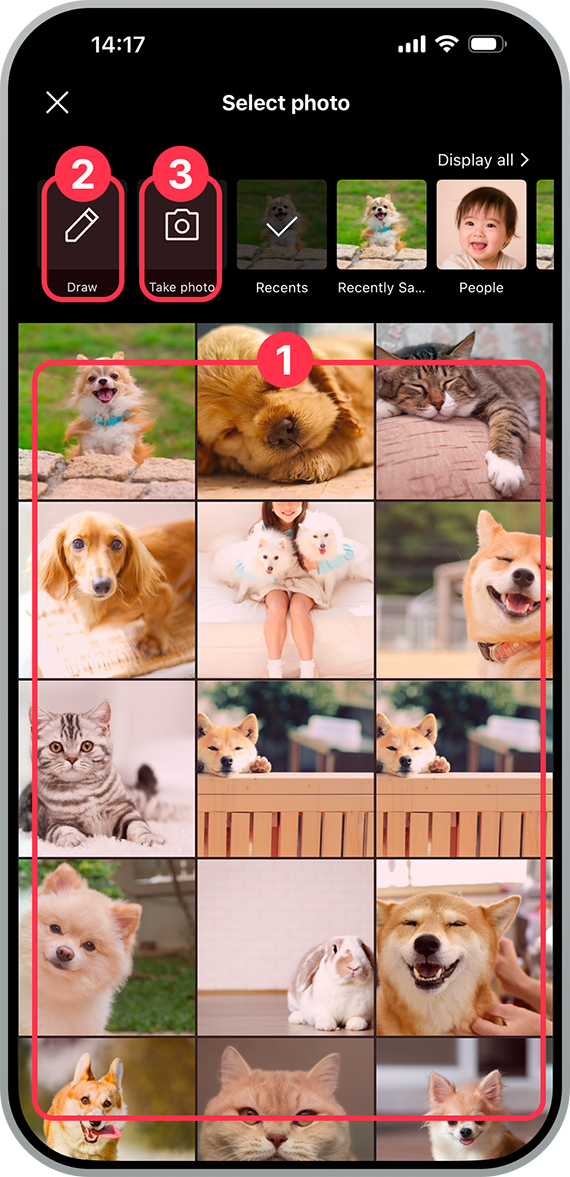
Select from either 1 (your photo library), 2 (Draw), or 3 (Take photo).
1 (Your photo library)
| Your photo library | Albums |
|---|---|
 |
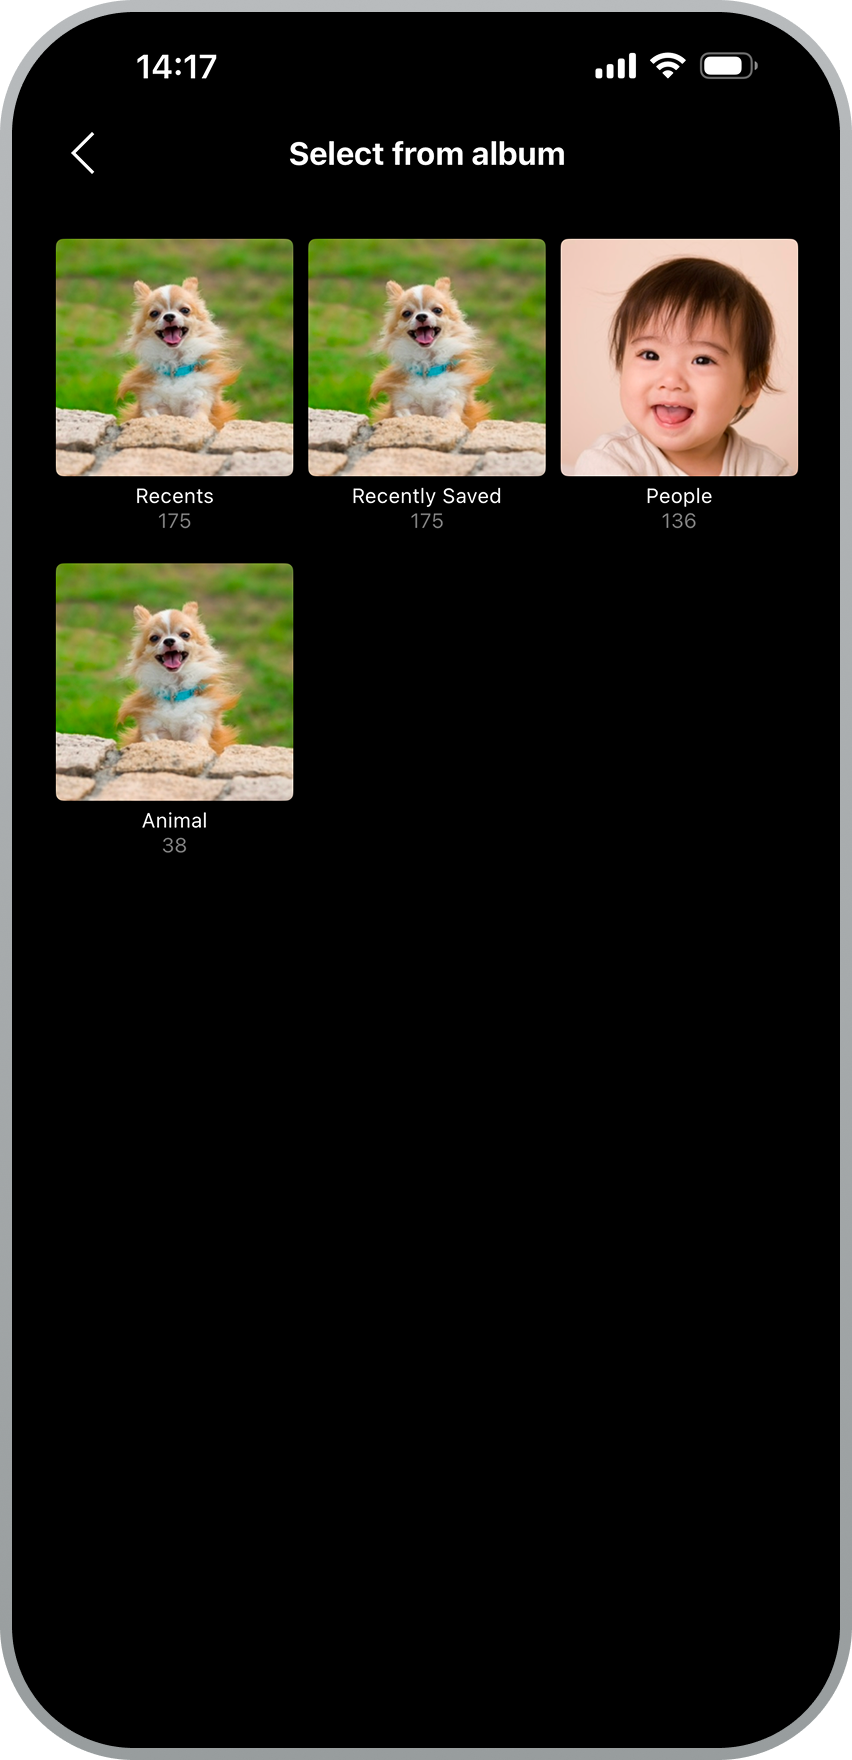 |
Select photos from your photo library. You can also search your albums.
2 (Draw)
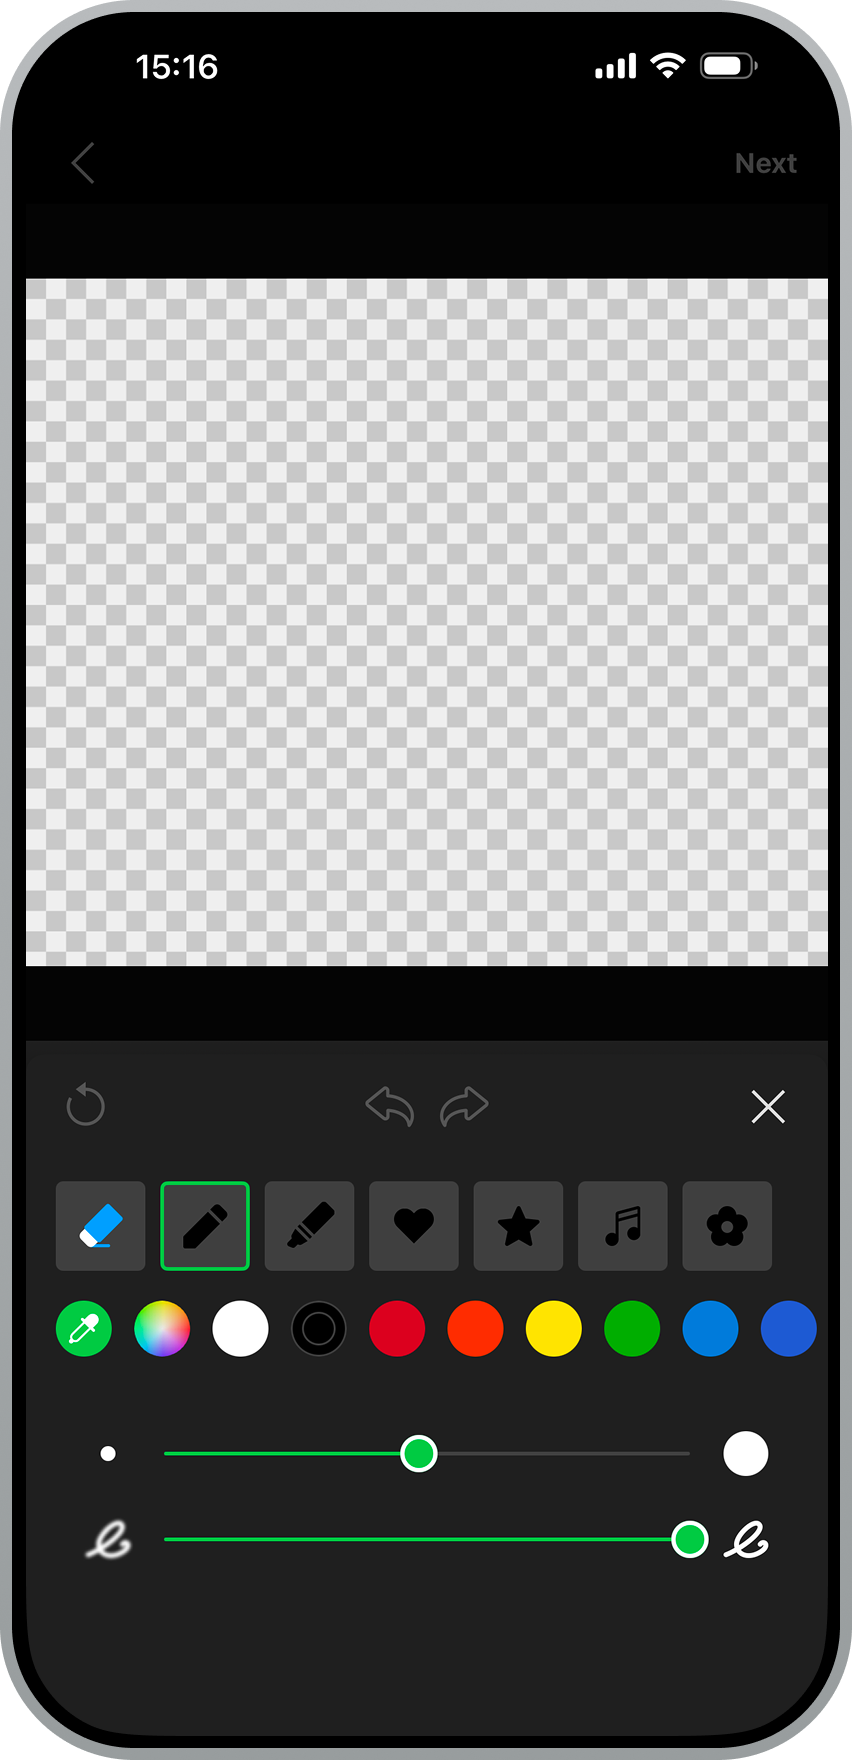
Draw a picture using brushes. You can also erase with the eraser and change the brush type, the color you're drawing with, and the brush's size and hardness.
Additionally, you can enlarge the view of the entire screen.
Note: Please make sure to fill in the inside of the picture. If you don't, it may be rejected during the review.
3 (Take photo)
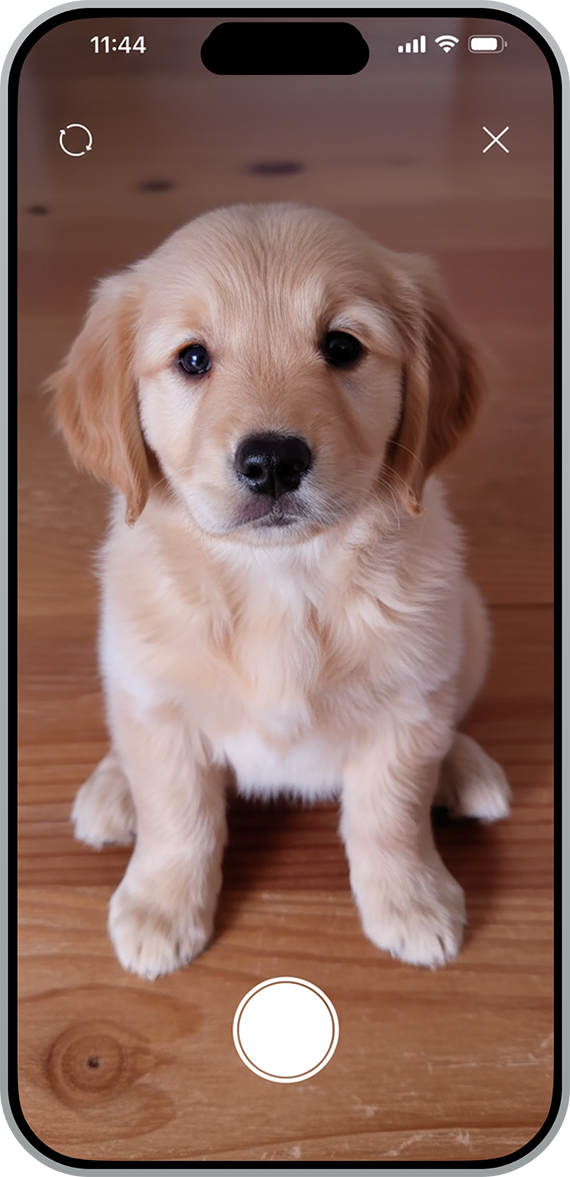
Open your camera and take a photo.
Trim a photo
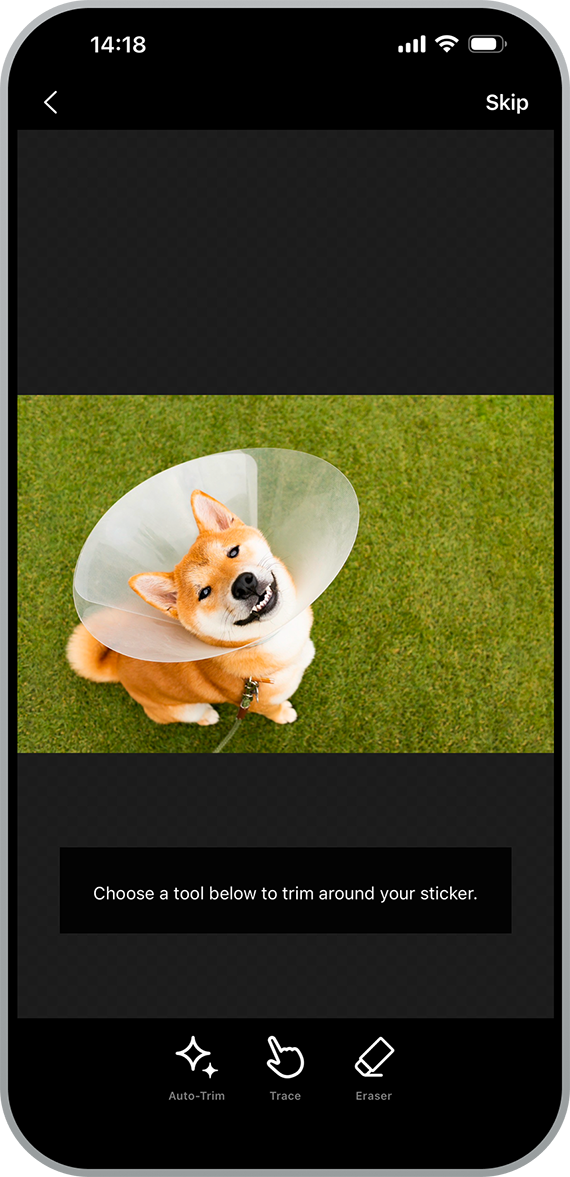
Select a method for trimming the photo. There are three trimming methods: 1 (Auto-Trim), 2 (Trace), and 3 (Eraser). If you don't need to trim the photo, select Skip. Once you've finished trimming it, select Next.
1 (Auto-Trim)
If you use Auto-Trim, you can have the app automatically trim the background just by drawing a rough outline outside of the part you want to make into a sticker. You can use Auto-Trim multiple times while erasing parts you don't need and restoring them, even after you've already trimmed the photo.
2 (Trace)
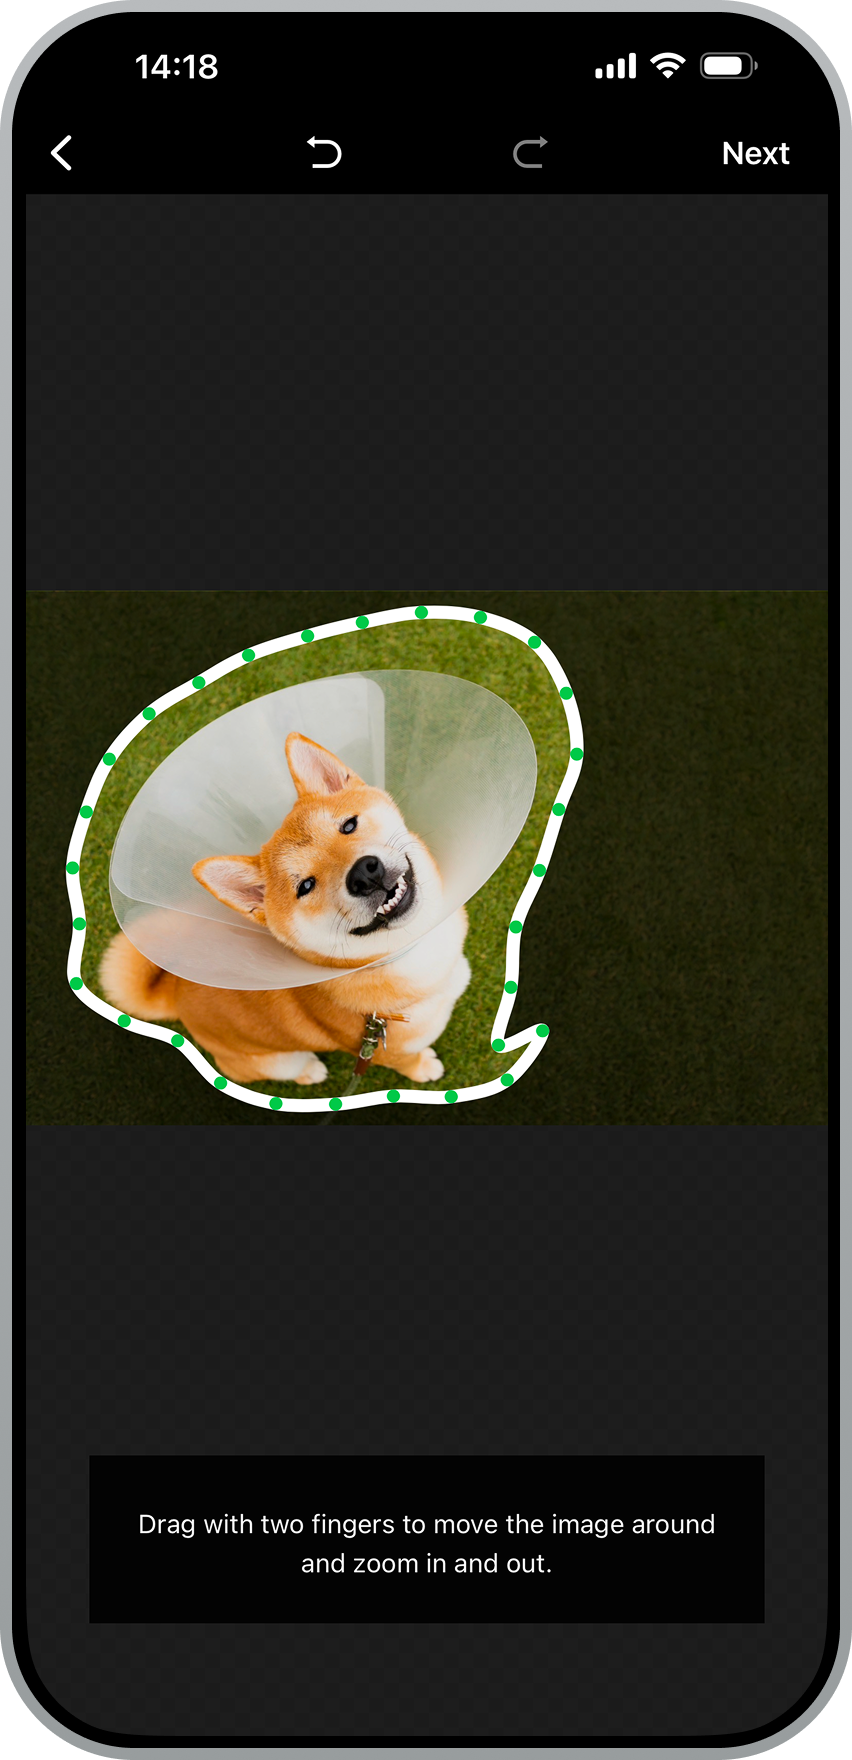
Trace around the part you want to trim with your finger. After tracing, you can make minor adjustments while zooming in or out or rotating the photo.
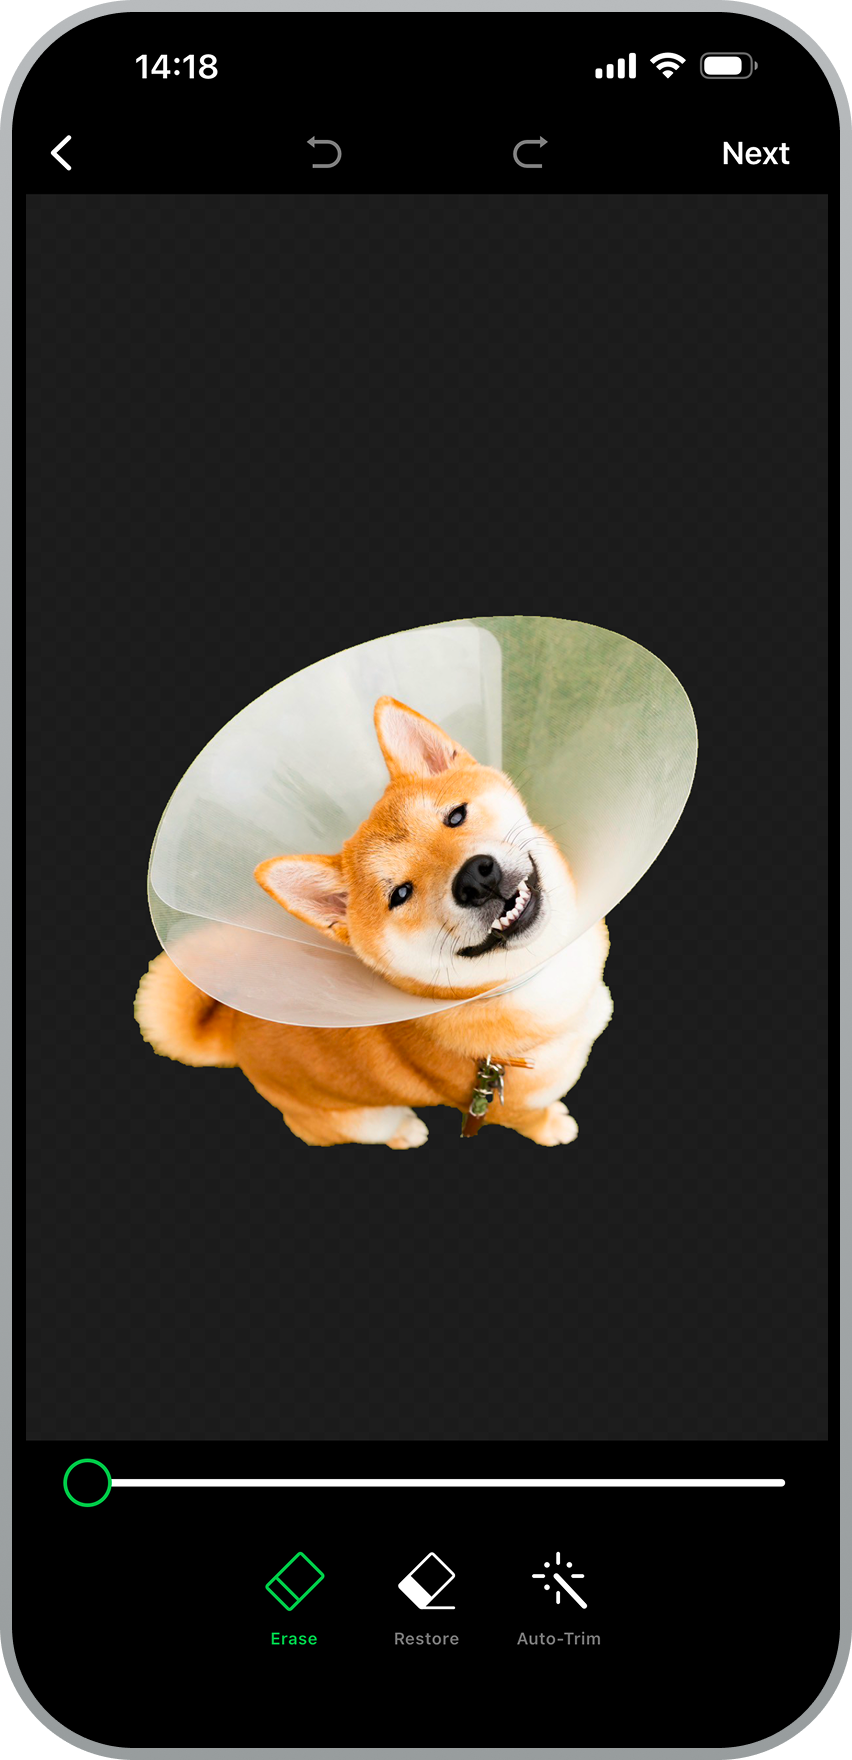
3 (Eraser)
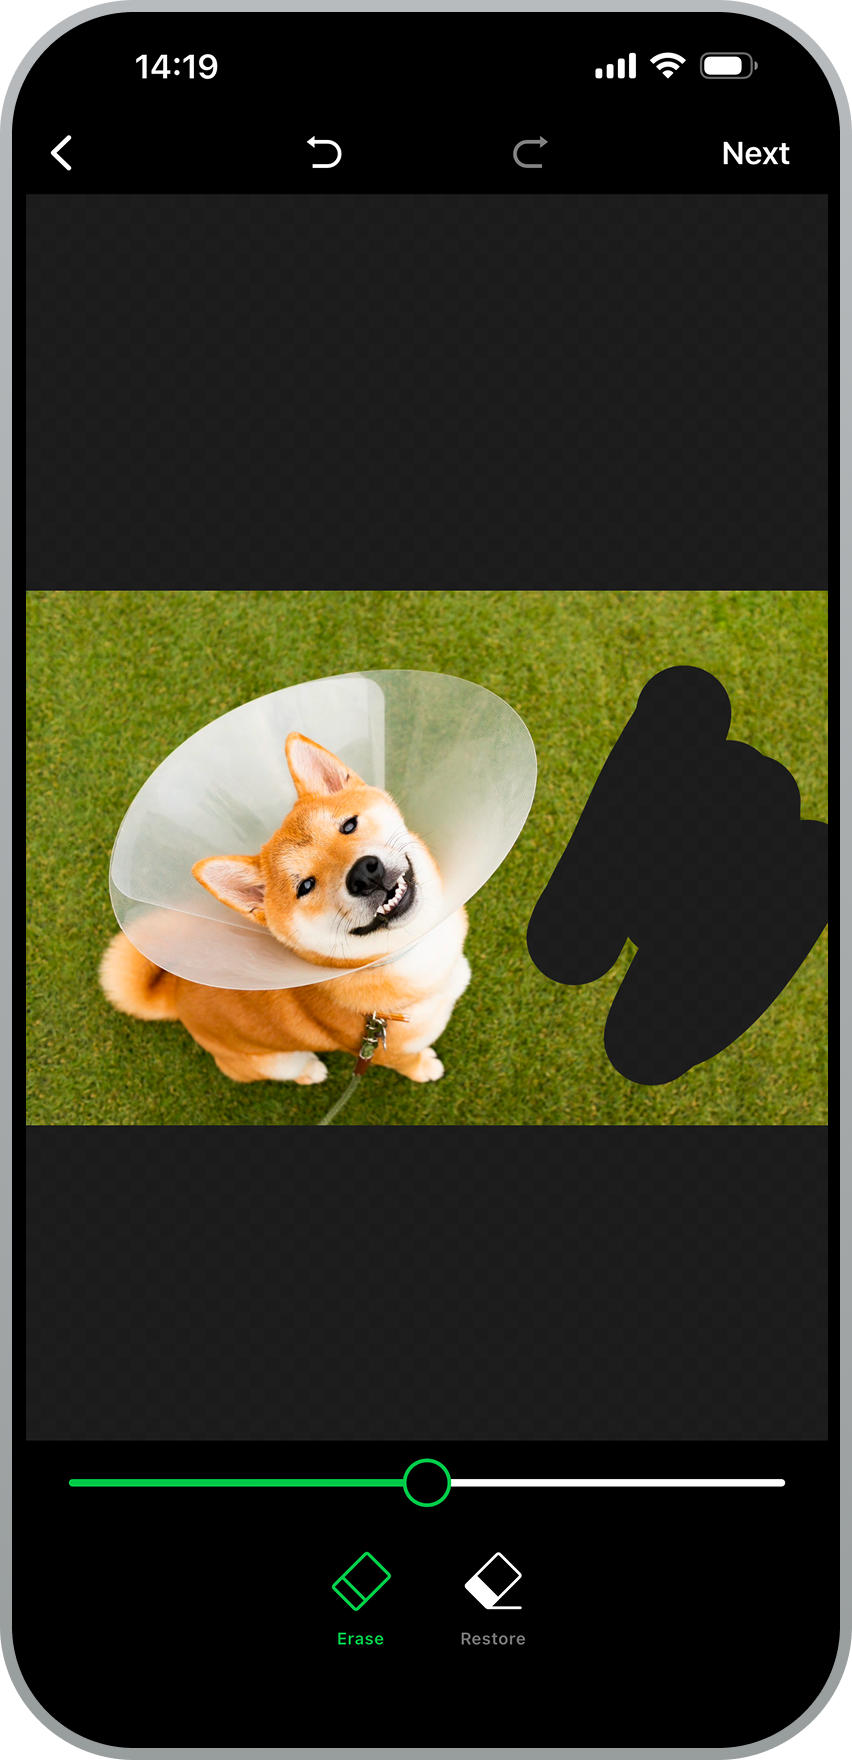
You can erase the parts you don't need. You can adjust the size of the eraser (the area that it will erase) by moving the slider left and right.
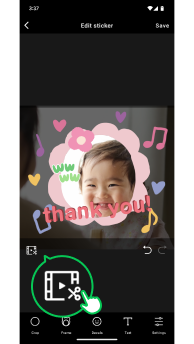
Editing
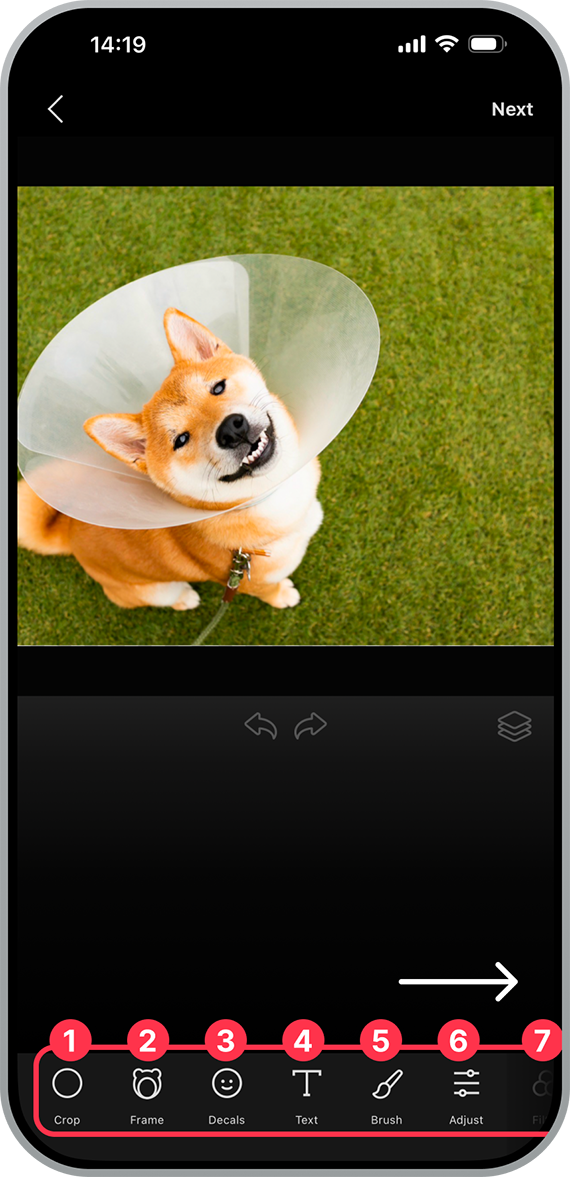
Edit your photo using the following editing tools: 1 (Crop), 2 (Frame), 3 (Decals), 4 (Text), 5 (Brush), 6 (Adjust), 7 (Filter). Once you've finished editing the photo, select Next at the top right of the screen.
You can move the arranged elements and shrink, enlarge, or rotate them with two fingers.
1 (Crop)
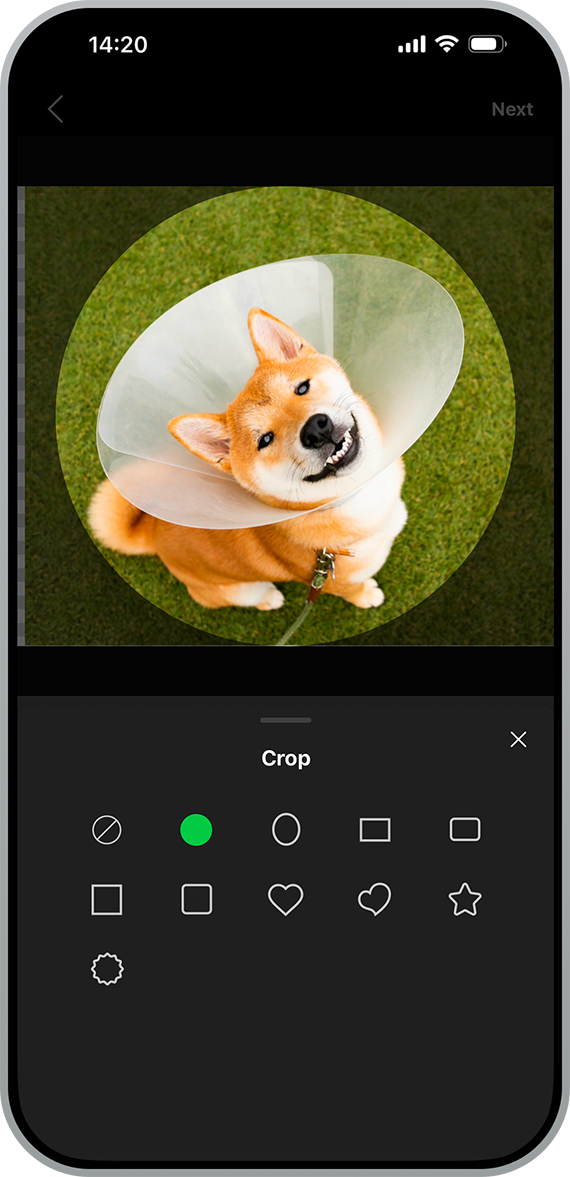
Cropping is as easy as selecting the shape you want.
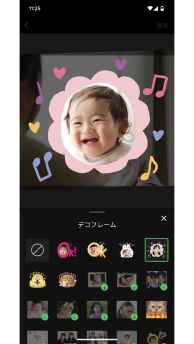
2 (Frame)
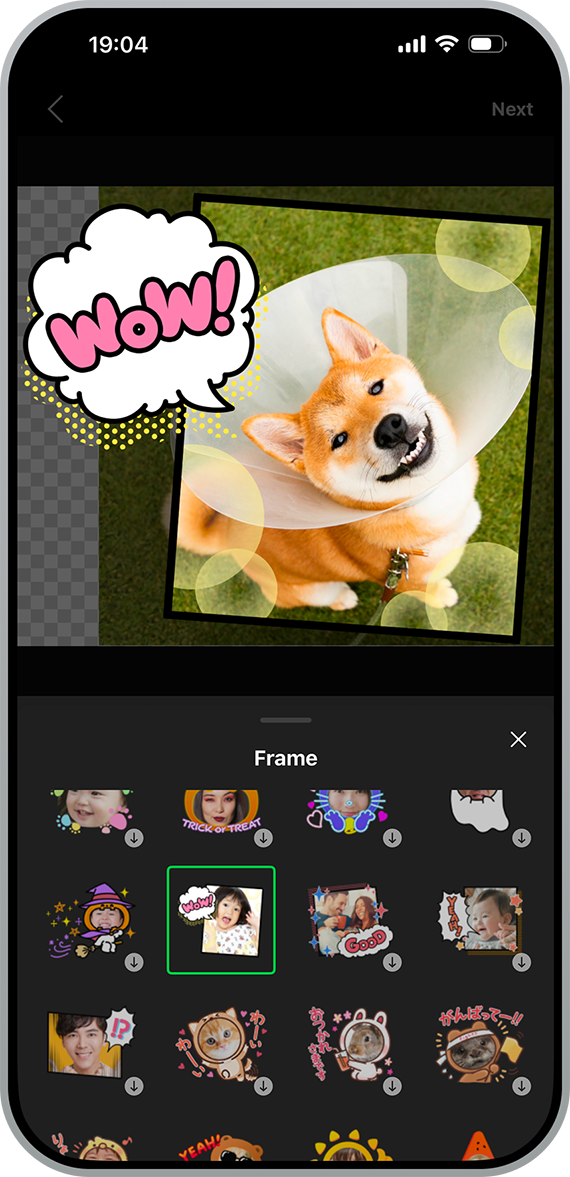
Crop your photos with adorable frames.
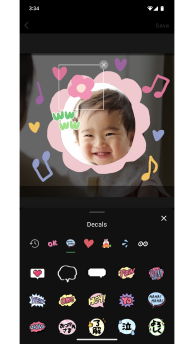
3 (Decals)
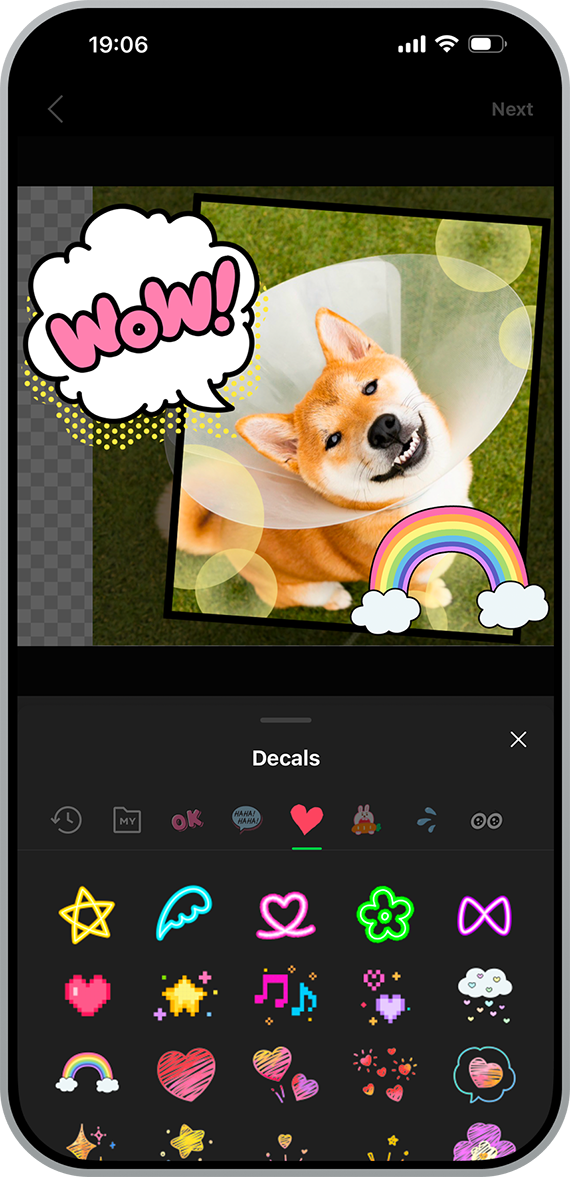
You can decorate your photos with various decals.
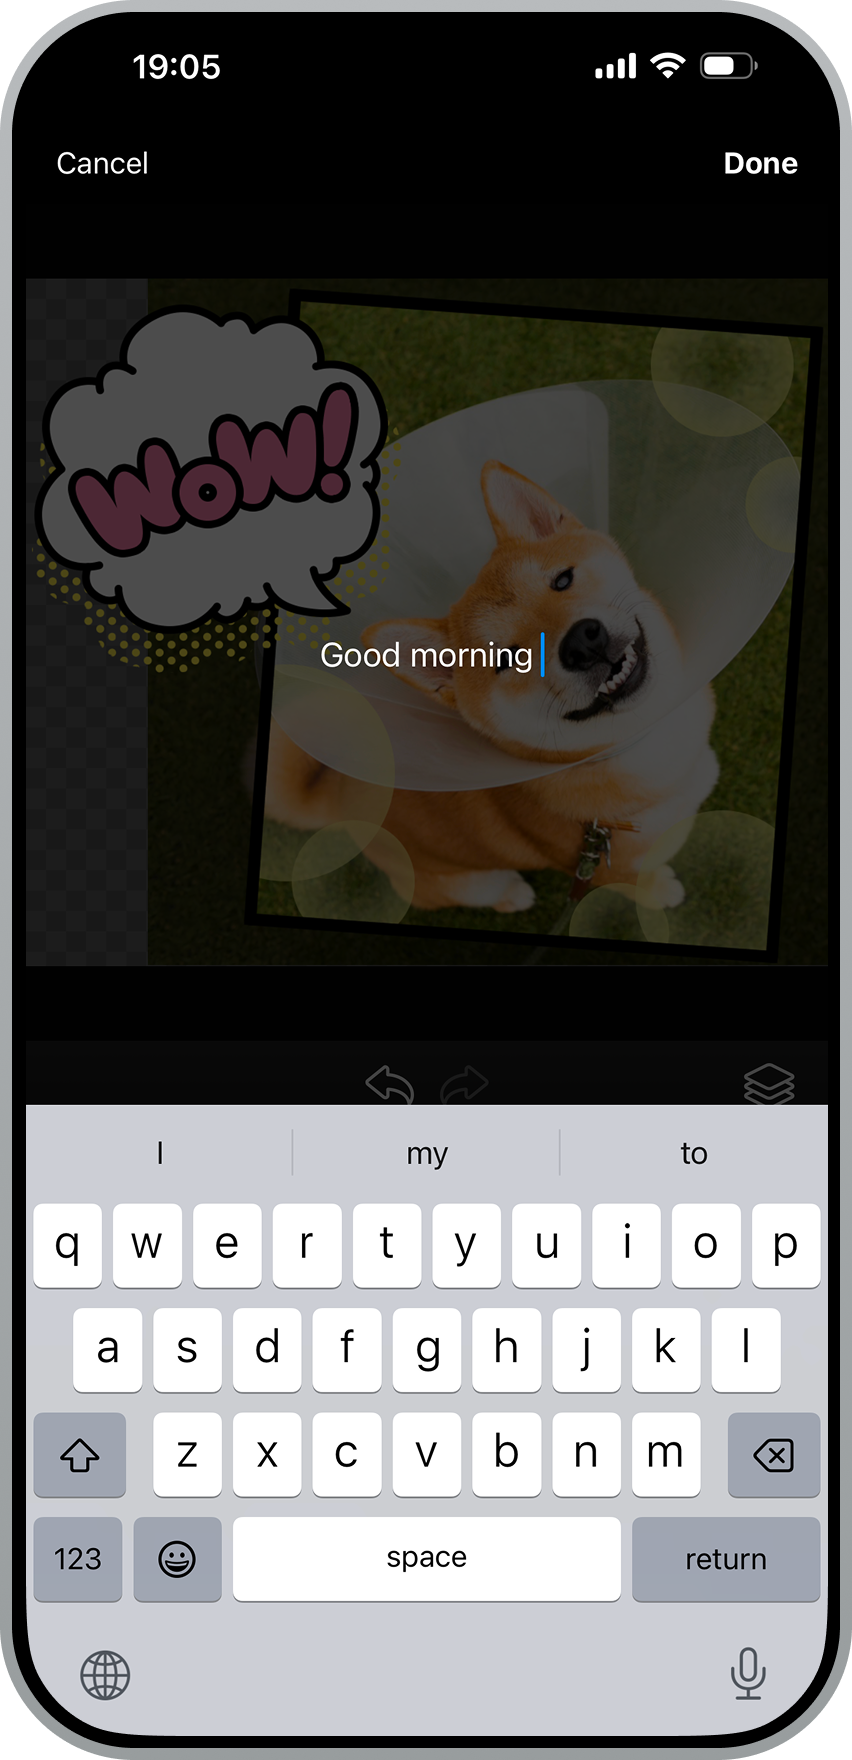
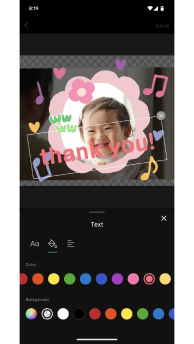
4 (Text)
| Inserting text | Editing text |
|---|---|
 |
 |
Add text in your preferred font and color using the text feature.
5 (Brush)

You can draw with your finger using the brush feature. You can also erase with the eraser and change the brush type, the color you're drawing with, and the brush's size and hardness.
Additionally, you can enlarge the entire screen.
6 (Adjust)
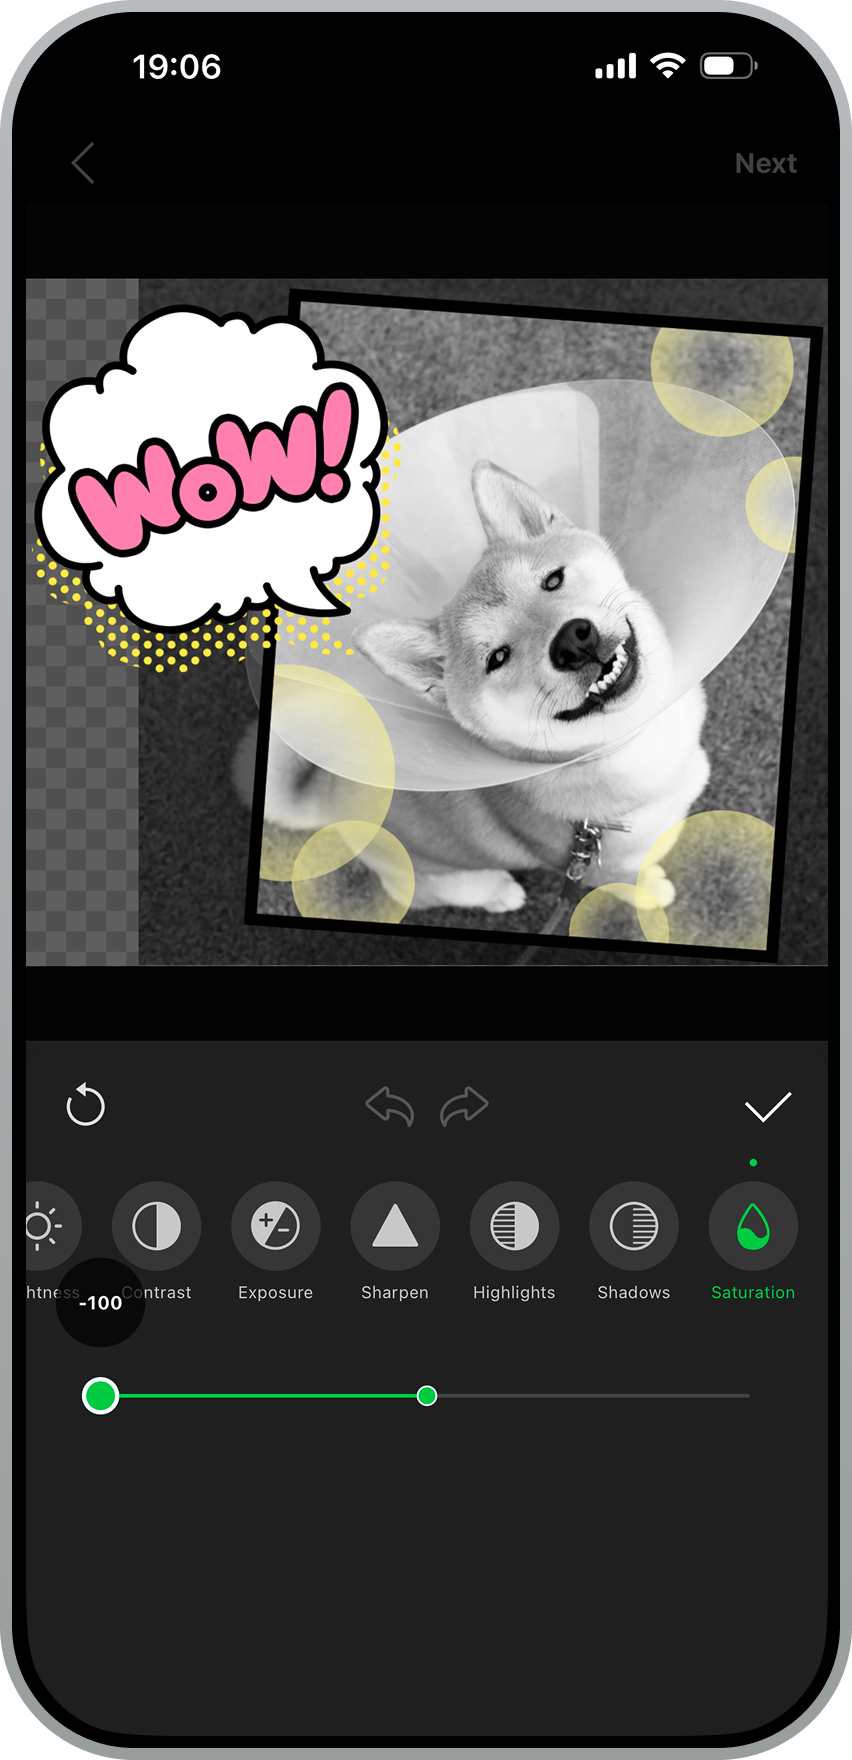
You can adjust the color tone of the photo with the following options:
• Brightness
• Contrast
• Exposure
• Sharpen
• Highlights
• Shadows
• Saturation
7 (Filter)

You can apply a filter that matches your tastes to the photo.
Change the order of layers
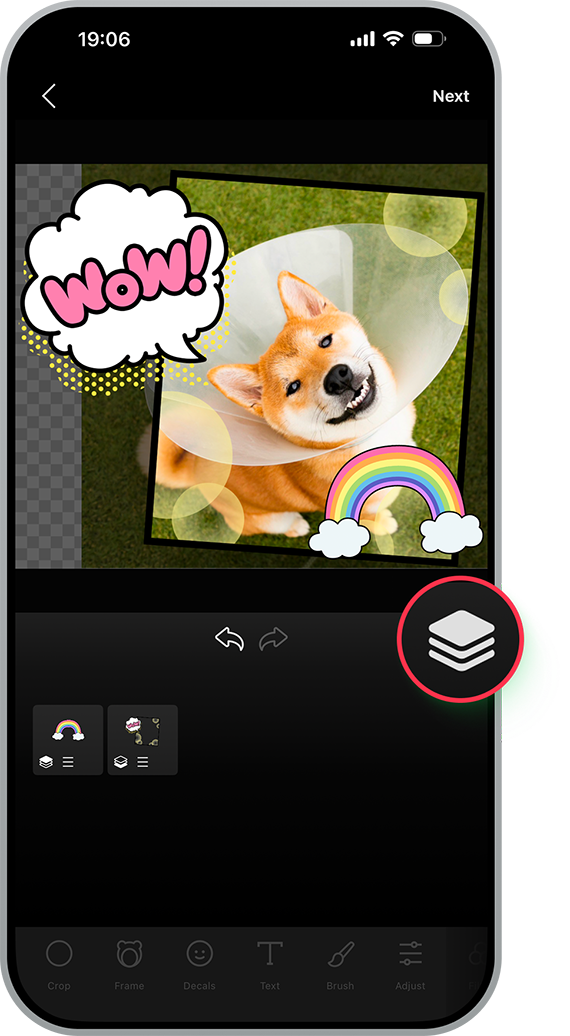
You can change how frames, decals, text, and objects drawn by brush overlap.
Checking the finished image

Select Next at the top right of the Editor to check how the finished image of the actual sticker looks in a chat. You can check how the finished image looks in three modes: Normal, Light, and Dark.
Saving the sticker you created

Select Save at the top right of the screen showing the finished image to save your sticker.
Creating a sticker from your decals
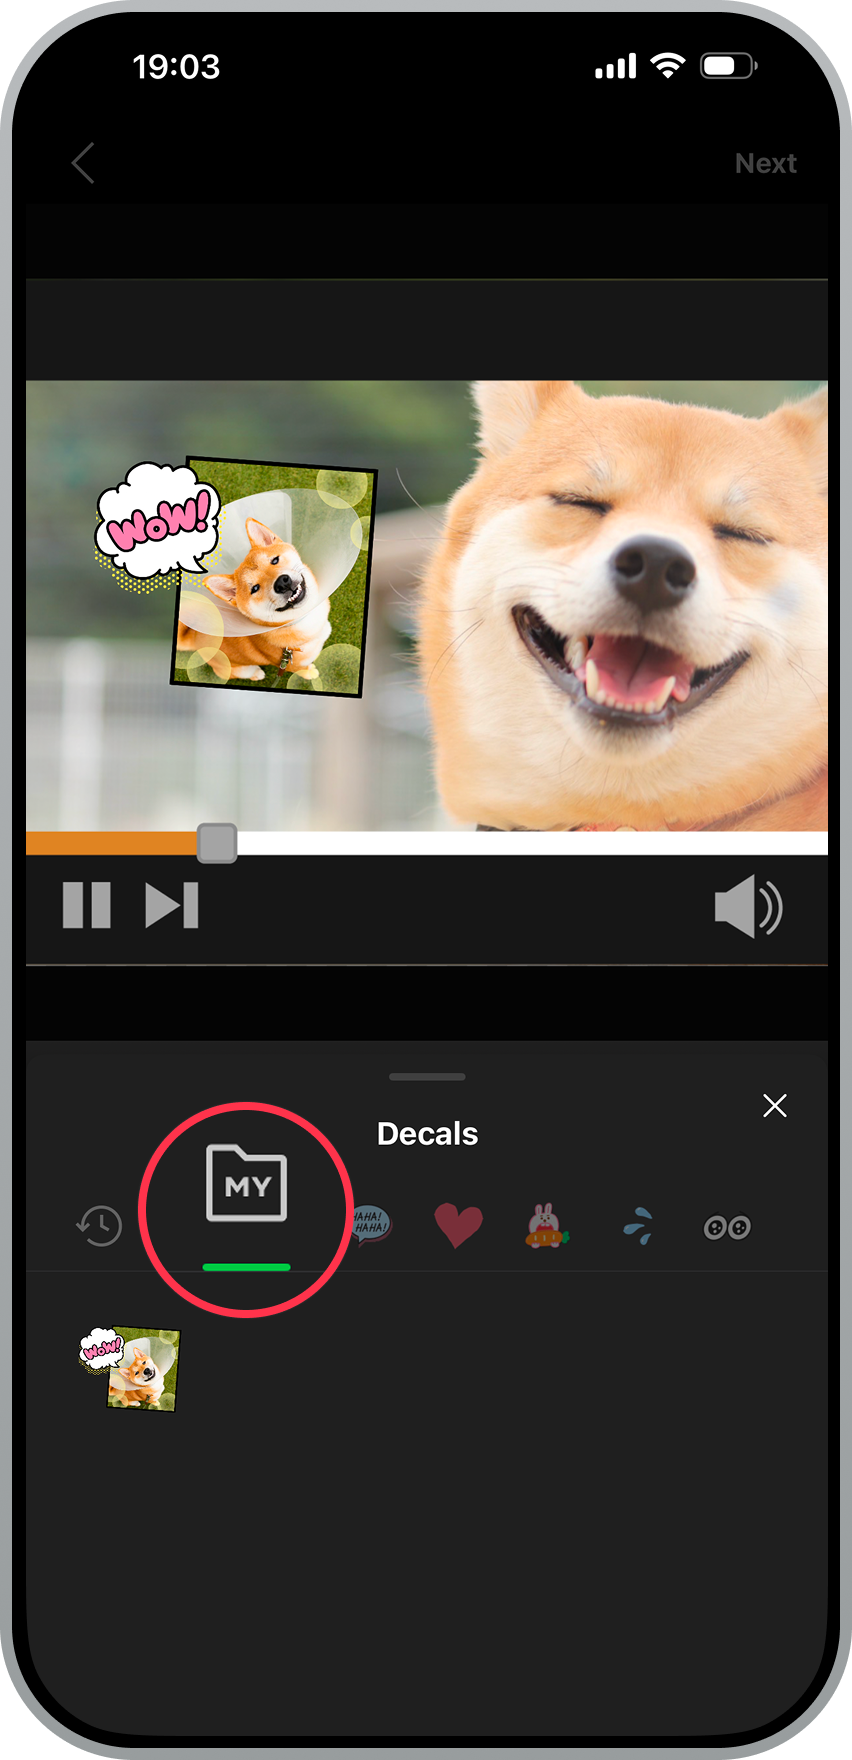
When you save a sticker you created, it will automatically be added to your decals. You can use it as material to create subsequent stickers with.
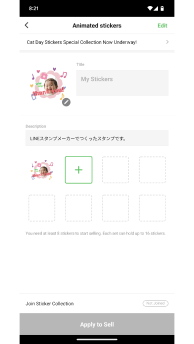
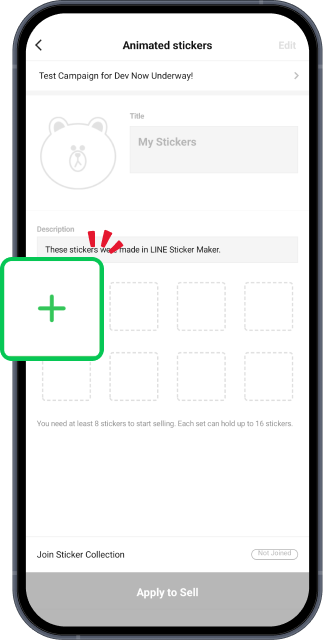
Adding stickers to sets
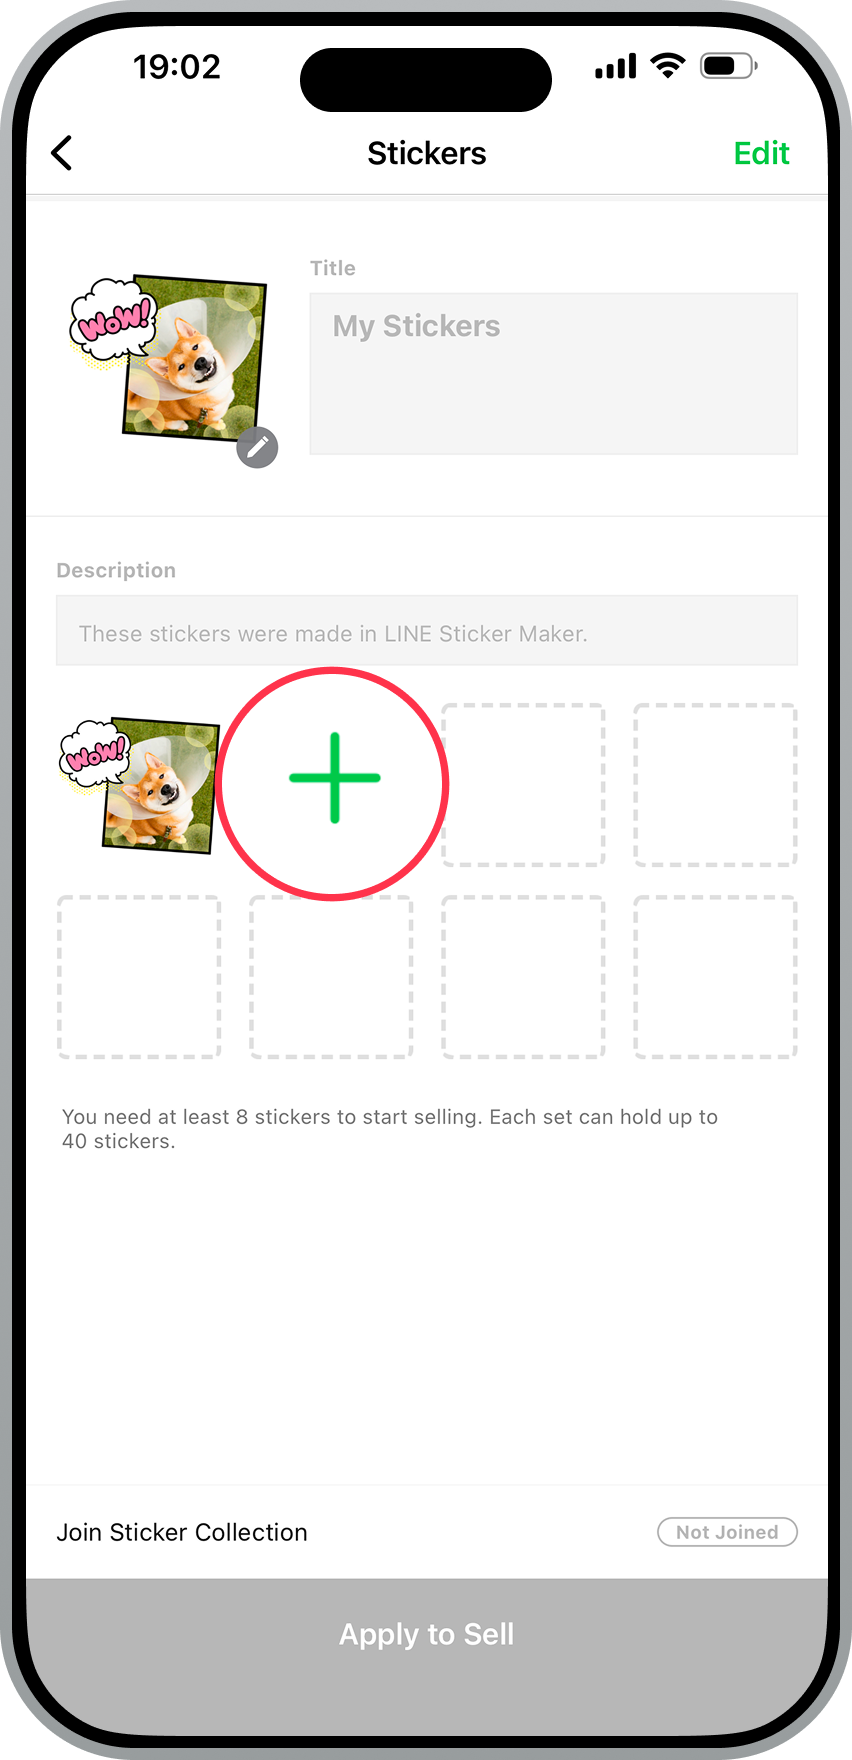
To add more stickers to your set, select "+" to create new ones.
Registering sticker information
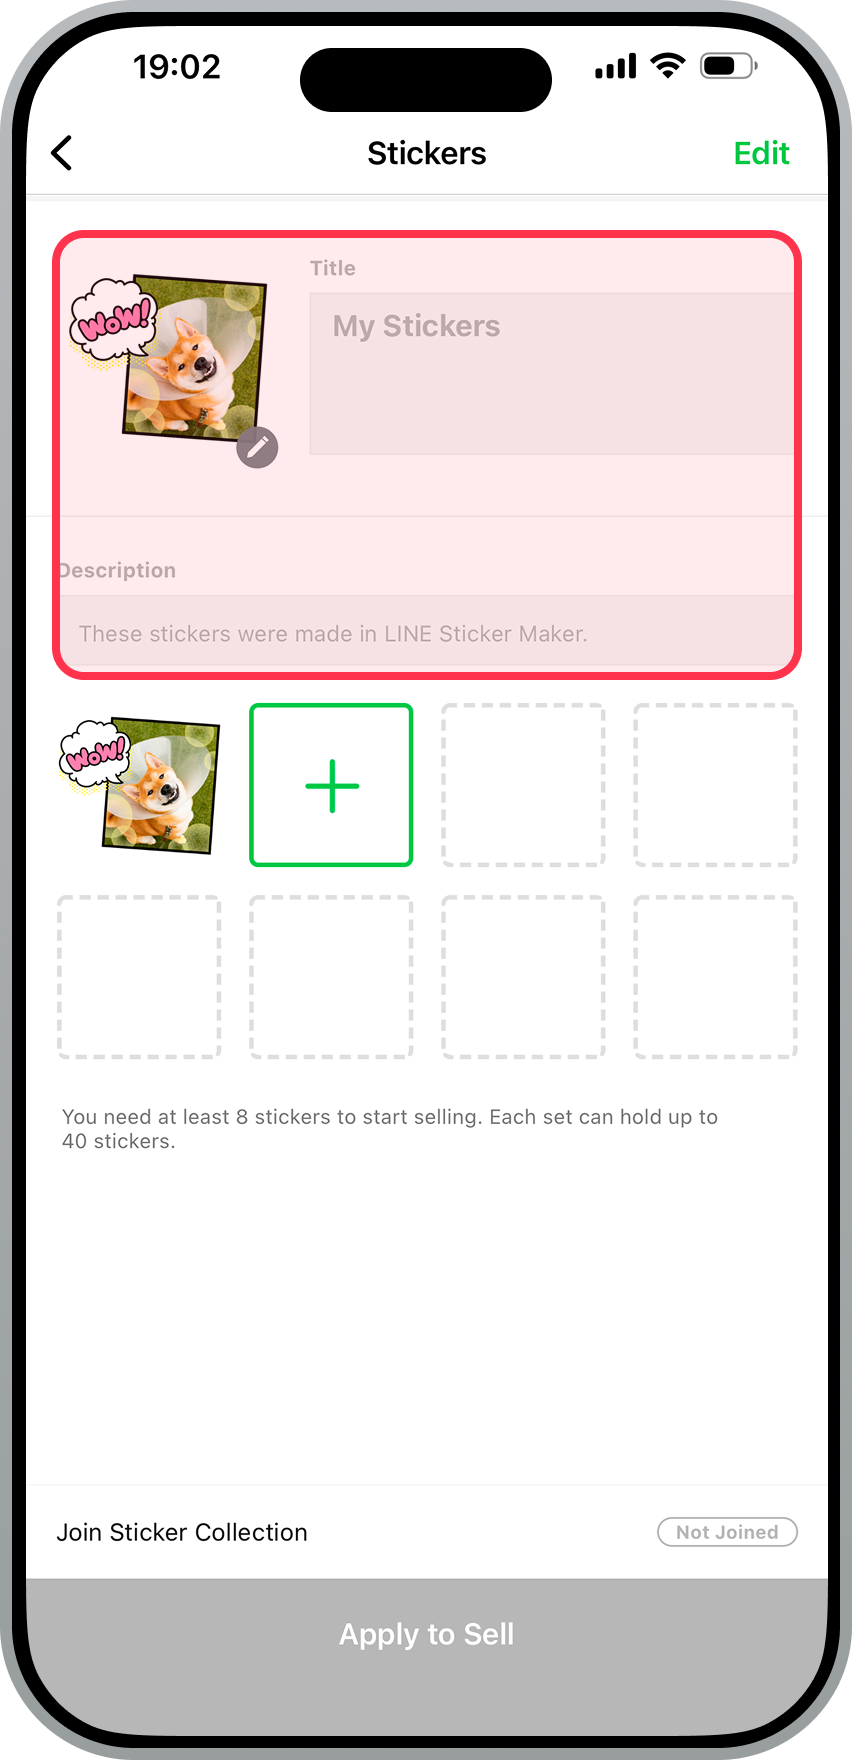
You can add a title, description, and select the main image.
Apply to sell your stickers
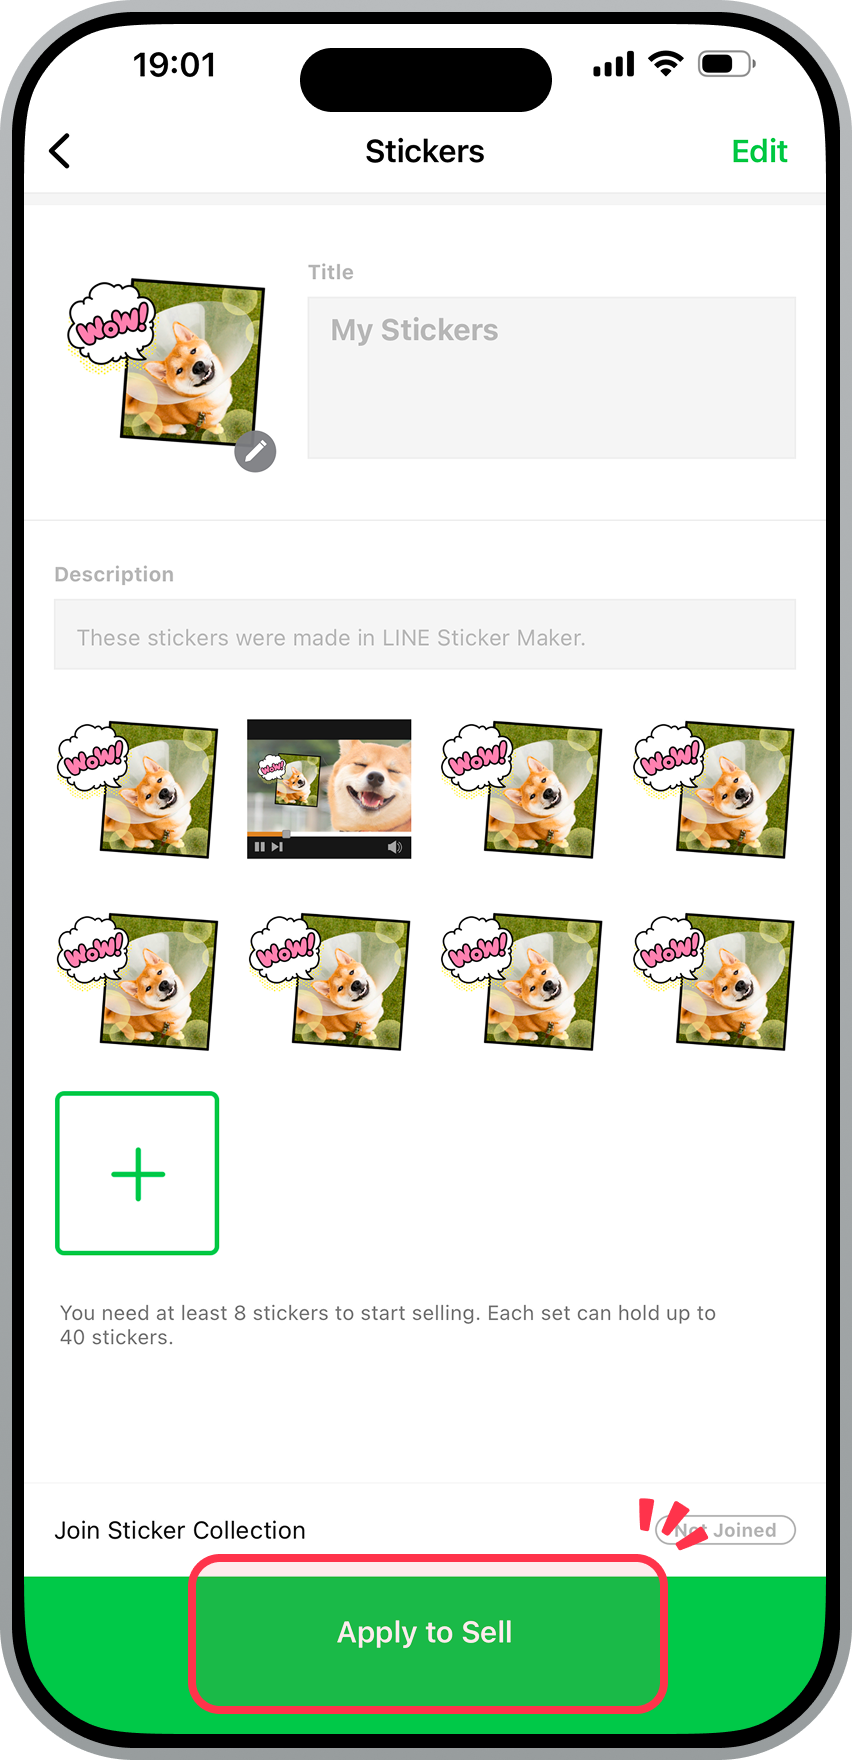
Select Apply to Sell. To sell your stickers, you need to have at least eight in your set. You can sell your stickers in sets of 8, 16, 24, 32, or 40 stickers.
Important: Stickers you make need to be reviewed for you to sell them. For details, refer to the Help articles under Process for selling stickers.
Was this page helpful?
Thank you for your feedback.
Sorry about that. What went wrong?
Note:
- Do not enter any personal information.
- We cannot respond to comments received from this form.
Note: If you're using photos, see Creating animated stickers using photos.
Tap Animated stickers
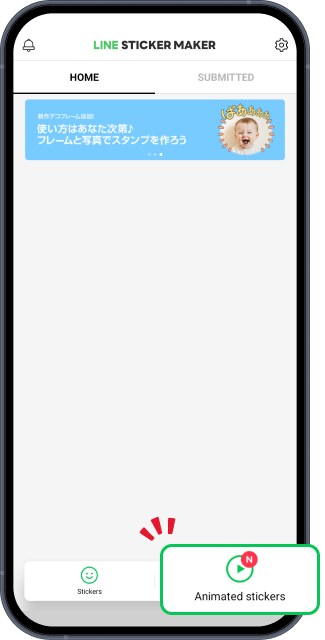
Tap Animated stickers to make an animated sticker from a video.
Start creating your stickers
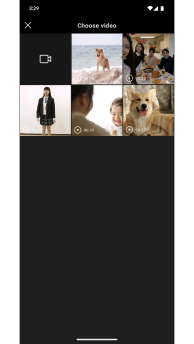
Select a pre-recorded video or take a new one. You can also select a frame and use it to take a video.
Choose a scene

Select the scene you want to make into a sticker and its duration in seconds (1 to 4 seconds).
Select a shape
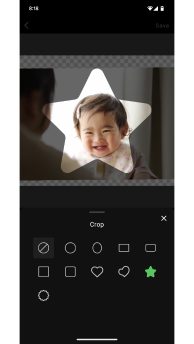
Cropping is as easy as selecting the shape you want. From there, you can adjust the cropping by using pinch gestures and dragging the video.
Select a frame
Crop your videos with an adorable frame.
Select decals
Give your stickers some character with decals.
Add text
Add text in your preferred font and color. You can also adjust the size and angle by using pinch gestures and dragging.
Adjust settings
Make your sticker loop or change the smoothness and image quality. Turning on Loop will make the video loop continuously for 4 seconds. You can adjust the smoothness and image quality to keep the sticker size within 1 MB. (For more details, see Adjustable settings for animated stickers).
Preview your animated sticker
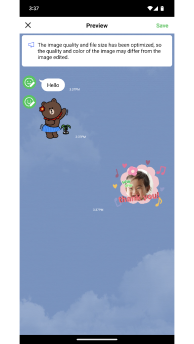
Preview the completed sticker.
After completing your animated stickers, apply to sell them
Once you have at least 8 stickers, tap Apply to Sell. You can sell your stickers in sets of 8 or 16 stickers.
To add more animated stickers to your set, tap "+" to create new ones.
Important: Stickers you make need to be reviewed for you to sell them. For details, refer to the Help articles under Process for selling stickers.
Was this page helpful?
Thank you for your feedback.
Let us know if we can make it better.
Note:
- Do not enter any personal information.
- We cannot respond to comments received from this form.
Sorry about that. What went wrong?
Note:
- Do not enter any personal information.
- We cannot respond to comments received from this form.
Note: If you're using videos, see Creating animated stickers using videos.
Tap Animated stickers
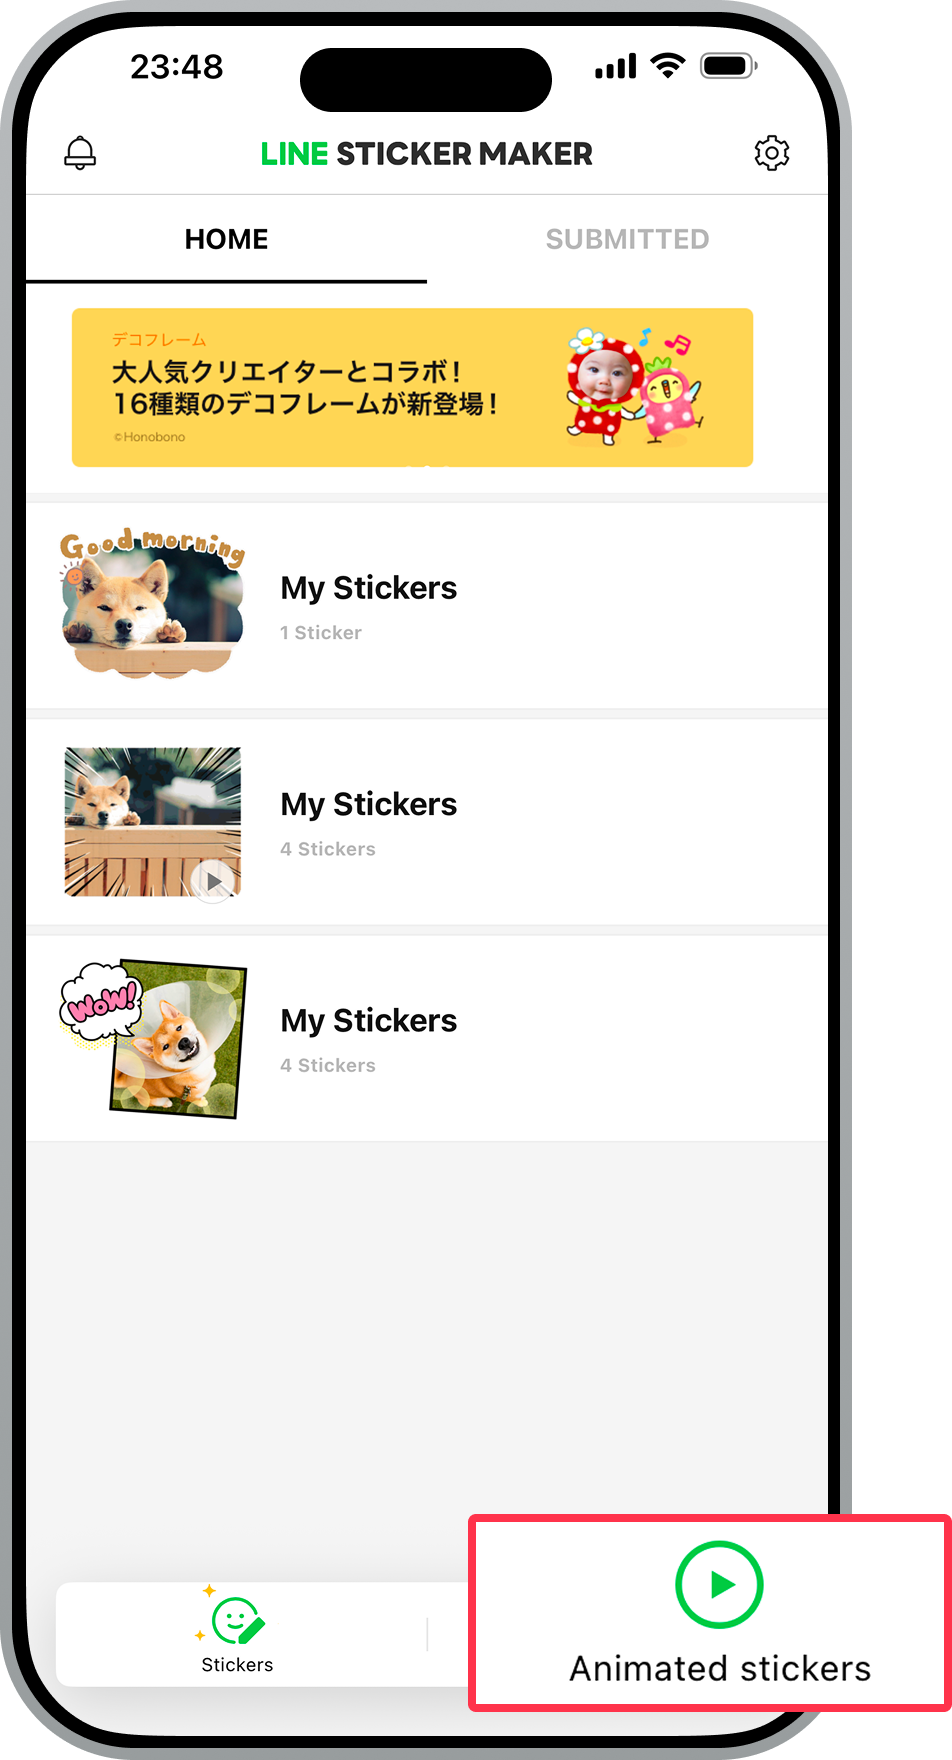
Tap Animated stickers to make an animated sticker from photos.
Start creating your stickers
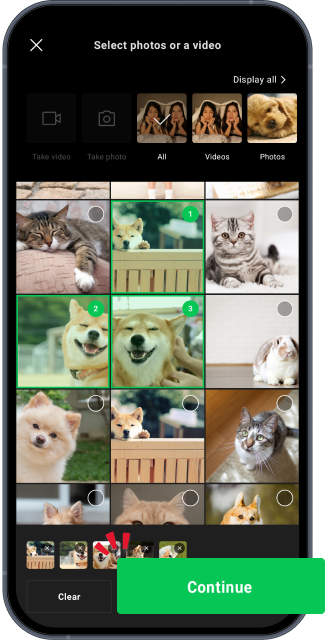
Select the photos you want to animate. You can select up to 20 photos.
Note: A photo will be deselected if it can't be accessed for any reason (e.g. the photo was deleted, or the app has limited access to your photos).
Rearrange the order of your photos
The animation will play in the order the photos were selected. After selecting your photos, you can rearrange the order by dragging them.
Note:
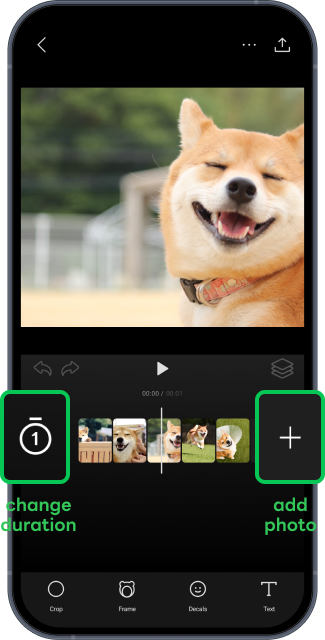
- You can add more photos by tapping "+" if less than 20 were selected.
- After selecting a photo, you can delete it by tapping the trash icon.
Tap the timer icon to adjust the playback length from 1 to 4 seconds.
Note: The default playback length will change based on the number of photos that were selected.
• 1 to 5 photos selected: 1 second
• 6 to 10 photos selected: 2 seconds
• 11 to 15 photos selected: 3 seconds
• 16 to 20 photos selected: 4 seconds
Select a shape
Cropping is as easy as selecting the shape you want. From there, you can adjust the cropping by using pinch gestures and dragging your sticker.
Select a frame
Crop your photos with an adorable frame.
Select decals
Give your sticker some character with decals.
Add text
Add text in your preferred font and color. You can also adjust the size and angle by using pinch gestures and dragging.
Adjust settings
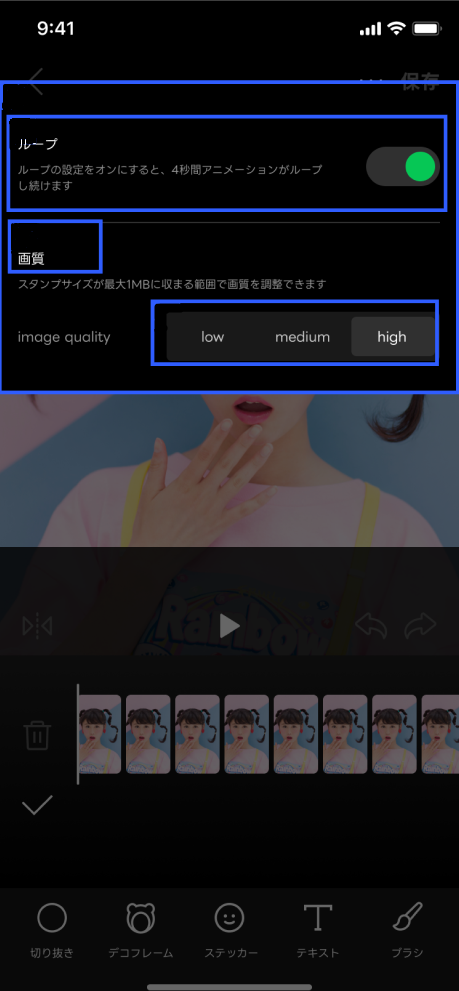
Make your sticker loop or change the image quality. Turning on Loop will make the video loop continuously for 4 seconds. You can adjust the image quality to keep the sticker size within 1 MB. (For more details, see Adjustable settings for animated stickers).
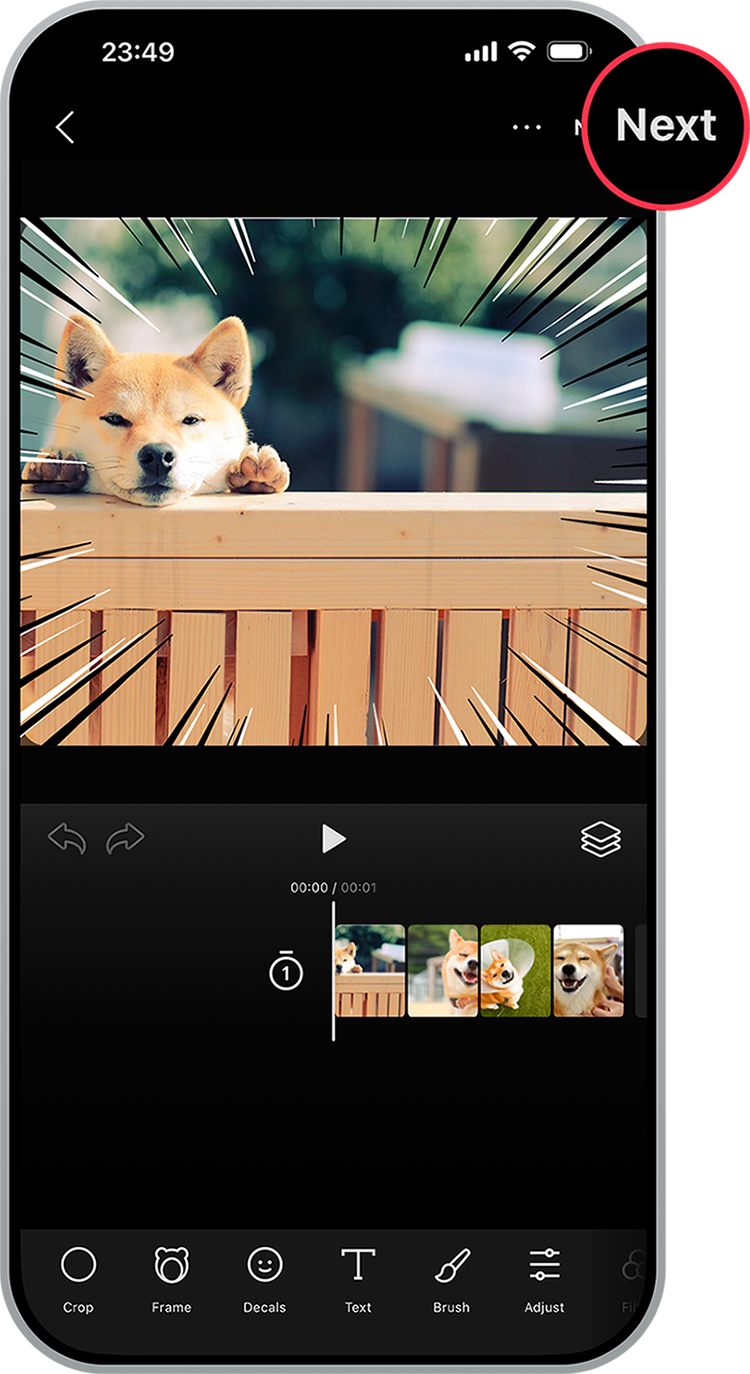
Tap Next at the top right of the editing screen and save your sticker
Note: You can't save your sticker if you haven't selected multiple photos and/or decorated it.
Apply to sell them

Once you have created at least 8 stickers, tap Apply to Sell. You can sell your stickers in sets of 8 or 16 stickers.
To add more animated stickers to your set, tap "+" to create new ones.
Important: Stickers you make need to be reviewed for you to sell them. For details, refer to the Help articles under Process for selling stickers.
Was this page helpful?
Thank you for your feedback.
Let us know if we can make it better.
Note:
- Do not enter any personal information.
- We cannot respond to comments received from this form.
Sorry about that. What went wrong?
Note:
- Do not enter any personal information.
- We cannot respond to comments received from this form.
Sticker Maker app:
Version 6.4 or later
Note: Version 7.0 or later is required to create animated stickers from photos.
• Android 6 or later
• iOS 15 or later
Languages:
Chinese (Traditional), English, Indonesian, Japanese, Thai
Was this page helpful?
Thank you for your feedback.
Let us know if we can make it better.
Note:
- Do not enter any personal information.
- We cannot respond to comments received from this form.
Sorry about that. What went wrong?
Note:
- Do not enter any personal information.
- We cannot respond to comments received from this form.
Loop
On: You can set the animation to loop a maximum number of times, corresponding to the number of seconds you selected for your animated sticker. One second stickers loop up to four times. Two second stickers loop up to two times.
Off: The animation will not loop.
Note: If the video length of the sticker is set to three seconds or longer, the loop setting will be automatically turned off. To turn it back on, please set the video length to less than two seconds.
Smoothness
The number of frames (illustrations) your animated sticker is composed of changes depending on your selected smoothness. You can select from Low, Medium, and High.
Note:High is selected by default.
The number of frames applied with each setting is as follows.
Low: 5 frames
Medium: 10 frames
High: 20 frames
Image quality
You can select the image quality for your animated stickers: Low, Medium, or High.
Note:Medium is selected by default.
The features applied with each setting are as follows.
Low: Indexed color mode
Medium: Indexed color and adaptive palette
High: Indexed color, dithering, and adaptive palette
Was this page helpful?
Thank you for your feedback.
Let us know if we can make it better.
Note:
- Do not enter any personal information.
- We cannot respond to comments received from this form.
Sorry about that. What went wrong?
Note:
- Do not enter any personal information.
- We cannot respond to comments received from this form.
Let us know if we can make it better.
Note:
- Do not enter any personal information.
- We cannot respond to comments received from this form.